|
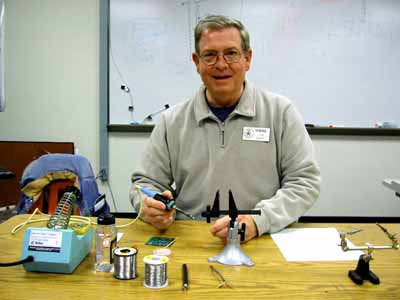
Basic
tools:
Soldering
iron or gun and a damp sponge or cloth to clean tip
Solder,
(rosin core for all electrical work) and flux
Long
nose pliers and wire cutters
Suitable
work surface and stand for the soldering iron
Vise,
clamps or other way to hold work steady
Sufficient
light to see the work (magnification also)
Temperature
controlled iron nice but not necessary
Wattage
of iron important -- 15 to 25
watts is appropriate for most light electronic work
A
larger tip can help with heavier work – connectors and larger wire
Clean
– Flux -- Heat – Solder – Wait – Inspect
Heat
the work, not the solder
Solder
alloys 60/40 or
63/37 tin/lead
eutectic alloy (no plastic state) 364°F
Choose
the amount of heat that is appropriate for the job at hand
Clean
frequently (before every new operation and every 15 seconds), oxidation is
the enemy
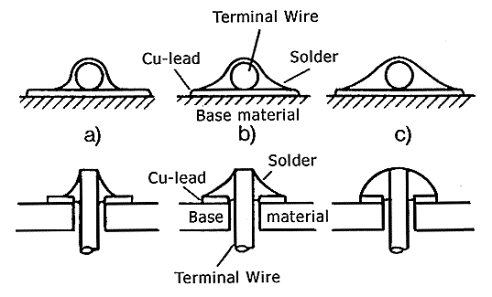
- Heat
the entire connection, not just the wire or lead. Use the flat of the
tip to maximize the surface area of the portion of the tip that heats
the connection. Doing this raises the temperature of the connection to
proper soldering temperature quickly and can prevent damage to
components and insulation.
- As
the tip contacts the work, insert the solder between the tip and the
work to allow a small amount of solder to melt on the tip and on the
connection. Remove the solder. Doing this speeds up the transfer of
heat from the tip to the connection.
- As
soon as the initially applied solder melts, feed enough additional
solder into the solder joint to make the final connection. Apply only
enough solder to do the job. There should be enough solder to cover
the connection while still showing some of the contours of the
connection.
- Don’t
disturb the connection as it cools. Connections with a large amount of
thermal mass will take quite a while to cool and solidify. If the
finished connection has a grainy or frosty look, something has moved
during the cooling process and the connection should be reheated then
allowed to cool without disturbing it.
- It’s
as easy as 1 – 2 – 3 .. 1
– Apply heat to the connection with a small amount of solder.
2 – Apply more solder to the connection to complete the
connection. 3 – Let the connection cool without moving the wire or
the part.
A
B
C
 A COOPERTools Reprint
|
Solder
Alloy Chart Alloy
Composition
|
Solidus
(°C)
|
Liquidus
(°C)
|
Tensile Strength
(psi)
|
Shear Strength
(psi)
|
Application Notes
|
|
Sn42
Bi58
|
-E-
|
138
|
8000
|
500
|
Low temp
electrical solder. May be used for step soldering.
|
|
Sn43
Pb43 Bi14
|
144
|
163
|
6120
|
|
Low temp
general purpose solder. Often used for step soldering.
|
|
Sn62
Pb36 Ag2
|
179
|
189
|
7000
|
7540
|
General
purpose solder. Slows silver leaching on silver bearing
surfaces
|
|
Sn63
Pb37
|
-E-
|
183
|
7500
|
6200
|
Eutectic
tin-lead solder. Most popular with electronic applications.
|
|
Sn60
Pb40
|
183
|
191
|
7600
|
5600
|
General
purpose solder. Useful for electrical and mechanical
applications.
|
|
Sn96.5
Ag3.0
Cu0.5
|
217
|
219
|
|
|
Tin-silver-copper
near eutectic solder. Currently a leading lead-free
replacement option for Sn63/Pb37.
|
|
Sn96.3
Ag3.7
|
-E-
|
221
|
8900
|
4600
|
Eutectic
tin-silver solder. Considered for lead-free and higher
temperature applications such as electronic step soldering and
automotive parts.
|
|
Sn100
|
MP
|
232
|
1800
|
2560
|
Pure tin
solder. Used for higher temperature, lead-free applications.
|
|
Sn95
Sb5
|
232
|
240
|
5900
|
6200
|
Lead-free
solder used where higher strength than pure tin and higher
solidus than tin-silver is required. Good wetting
characteristics.
|
|
Sn95
Ag5
|
221
|
245
|
10100
|
8400
|
High
strength lead-free tin-silver alloy. Good wetting
characteristics.
|
|
Sn10
Pb88 Ag2
|
268
|
290
|
4900
|
4300
|
Lowest
solidus general purpose “high temp” soft solder.
|
|
Sn5
Pb92.5 Ag2.5
|
287
|
296
|
4210
|
2240
|
General
purpose “high temp” soft solder.
|
|
Sn10
Pb90
|
275
|
302
|
4400
|
3780
|
General
purpose “high temp” soft solder.
|
|
Sn5
Pb95
|
308
|
312
|
4190
|
3000
|
General
purpose “high temp” soft solder.
|
|
-E-: Eutectic MP: Melting
point
█: Lead free solder
|
|
|
|
|